

How To Weatherproof Your Leather Boots
Posted by Aaron Snow on Feb 6th 2017
By Zachary Shenal - See original article on the Huckberry site HERE.
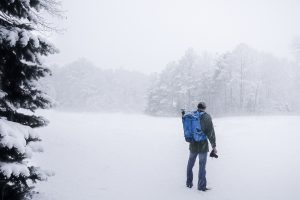
With winter snow in full force and more precipitation surely in the forecast as spring approaches, it's high time to ensure that your shoes are protected from the ice, moisture, and salt that accompany these late winter months.
In this guide, you'll learn how to restore and weather-proof a pair of worn and salt-damaged boots, as well as how to initially protect a new pair of leather boots so that they stay strong all season long – and into next year.
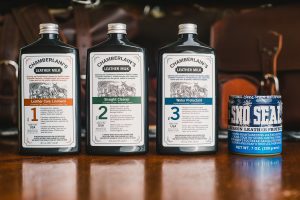
Shopping List
For all my cleaning, conditioning, and protection needs, I went with the all-natural Chamberlain's Leather Milk No. 1, No. 2, and No. 3.
For heavier-duty protection, go with Atsko's Sno Seal, a beeswax waterproofer that protects leather from rain, sun, snow, and salt.
Restoring Old Boots
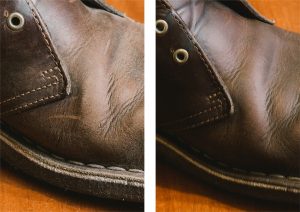
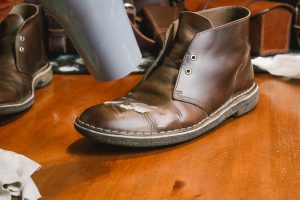
In this first section, we're going to bring a pair of three-year-old Clarks Desert Boots back to life. I admit to neglecting them, and as a result, it will be more labor intensive to restore than if I had taken better care of them — AKA, weather proofing sooner rather than later.

Step One: Using a dry brush, remove any dried mud or caked dirt from the boot. Then, using a warm, damp cloth, gently wipe off any salt or clumps left. When the shoe is mostly clean, let it dry for several minutes.
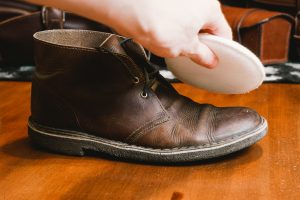
Step Two: These particular boots were very dirty and damaged, so I cleaned them with Chamberlain's No. 2 Cleaner. Removing the laces, apply cleaner to the included buffing pad, and gently massage it into the surface of the leather. Apply it generously and scrub at any salted spots. Once the boot is clean, let it sit for 15 minutes, giving the cleaner a chance to dry.
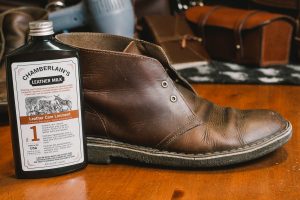
Step Three: Once the boot is dry, it's time to restore the oils and nutrients that make the leather pliable and healthy. There are many products available for this purpose, but in my opinion, few can compete with Chamberlain's Leather Milk No. 1. Applying the No.1 is very similar to the cleaner.
After applying some to the buffing pad, massage the milk into the surface of the boot. Be cautious not to smother the boot, but rather allow the leather to gradually absorb several coats of the leather milk. All in all, these boots absorbed about three coats, and you'll quickly notice a difference in the color of the boot as you use the leather milk, restoring it to a rich, healthy brown. Let the boots sit for 30 minutes.
Step Four: Now that the boot is back to a healthier condition, it's time to protect them. Since these boots are my everyday shoes, I want to coat them in the most protective product available. Sno-Seal is a beeswax coating that shields the leather from all water without clogging the pores.
First, get a hair dryer and heat the shoes until they are uniformly warm. (If you don't have a hair dryer, just sit them on a heater or in front of a fire.) It's very important that the boots be warm so that the wax applies evenly. Once the boot is warm, scoop out a glob of the Sno-Seal and rub it all over the boot. Be careful to get lots of the wax all over the welt of the shoe, as well as on the seams; this is where most of the water will come in, and so it will need the most attention. As the boot cools, reheat it and add more wax as needed. When you feel like the boot is solidly coated, heat the boot one last time and wipe off the excess Sno-Seal. Repeat on second boot.
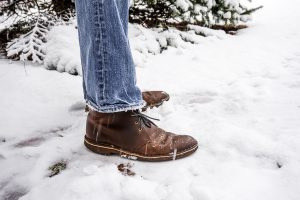
Step Five: Reinsert the laces and strap on the shoes for a test run. My once haggard and brittle boots are now ready for another season of hard wear. The wax should last through the season of inclement weather, and in the summer, I'll strip it off and treat my boots with Leather Milk No. 1.
CARING FOR NEW BOOTS
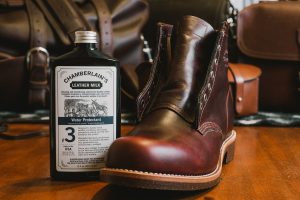
After browsing through the boots on Huckberry, I decided to treat myself to some new kicks. All the brands seemed fantastic, but I was most drawn to the Chippewa 6” Service boots in cordovan.
I wanted to keep the deep, rich color of the boot alive as long as possible through the winter and the spring. That ruled out Sno-Seal, as I didn't want a hazy color on my good shoes, nor did I need the massive protection it provides. So I settled on Leather Milk No. 3 – it performs the same restorative functions of Leather Milk No. 1, but has additional water-repellant properties. I'd spent a few days testing it on smaller leather products, and I liked it – it isn't as robust as Sno-Seal, as it soaks into the boot rather than providing a wax coat. While the No. 3 can darken lighter leather, there will be no change on brown or darker-colored leathers.
Here's how to care for your shiny new boots.
Step One: Remove the laces to keep them clean. Gently wipe the boot with a dry cloth – all you're doing is wiping off dust, if there is any.
Step Two: Apply some No. 3 to the included buffer pad and gently massage it into the surface of the boot. Be sure to apply it to all surfaces of the boot, especially the seams. Apply two coats, and let the boots sit to dry for 30 minutes.
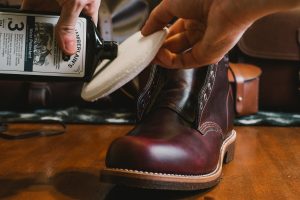
Step Three: Feeling like applying a bit more protection to the boots? Apply a bit of Sno-Seal on the welt of the boot – it's not a noticeable area, and is the most likely point of water entry into your shoe. As before, heat the boot, and gently coat the welt with a Q-tip.
With both pairs of my shoes clean, coated, and ready to go, you're ready to face whatever comes for the rest of this winter and spring. See you out there!
Zach Shenal is an adventure photographer based on Maryland's Delmarva Peninsula. He takes photos for Outward Bound and can't wait to give ice climbing another shot.