

How to Heal Cracked Leather
Posted by Leather Milk Customer Orders on Sep 7th 2017
Aficionados, there is no sight more grimacing, more spine-tingling, more viscerally terrifying than the sight of cracking leather. This poor, emaciated beast that has survived in a dark corner, in a forgotten chest, or hiding in plain sight on an unfrequented basement shelf - has finally emerged into your life again, giving you a very palpable moment of regret like Scrooge meeting the Ghost of Christmas Future.
So, how then are we supposed to wake up from this bad dream?
How it Happens
First, it's a good idea to know exactly what's going on when leather is cracking. At a microscopic level, leather is made up of countless tiny fibers that weave and wind together in complex fashions, dense near the surface, and looser the further in you go. While this leather was living skin, it was kept nourish with continuously replenishing natural oils. Now that it is living skin no longer, these oils are no longer replenished. This means that the fibers weaving together that your leather is made out of are constantly rubbing against each other when your leather flexes or moves, and as the fibers begin to dry, this causes them to chafe and scrub each other into dust over time. To prevent this, the leather will need its fibers to be oiled and slippery through use of a conditioner, allowing the fibers to move against each without harm. When leather has not been conditioned in some time, the leather will dry out. This is especially true if the leather has been receiving regular exposure to direct sunlight, which will cause leather to age prematurely and break it down on a molecular level. UV radiation is actually a primary cause of cracked leather. If you have leather exposed to sunlight frequently, try to keep it covered with a blanket when not in use, or give it UV resistant conditioner, such as Auto Refreshener No. 4.
How to Fix It
As for fixing cracked leather, there's some good news and some bad news you need to know about. Since I'm an insatiable optimist who can't help but try to end everything on a happy note, I'm just going to go ahead and get the bad news out of the way first. Cracked leather can't really be mended back together. Once fibers break, that's pretty much it. Those fibers are broke. Likewise, when cracks develop in your leather, they can't really be un-cracked. With a deft hand, some cracked might be sewn or filled in, although this process can be tricky. Instead, it is far easier (and oftentimes, even more aesthetic) to strengthen the fibers surrounding the cracks that are still intact, and help the rest of the scar to blend in naturally with the rest of the leather through use of a strong conditioner. This process is similar to healing scratched or cut leather, which disrupt fibers near the surface, instead of all the fibers throughout, as is the case with cracked leather.
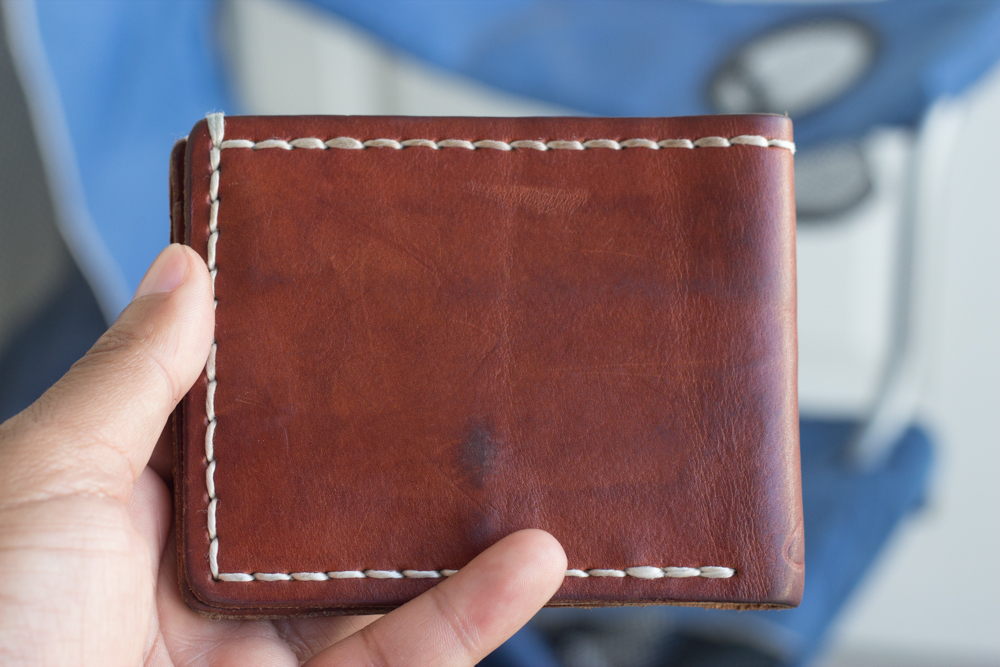
The effects of this latter treatment essentially disguise blemish, while helping your leather to grow strong and naturally into its new shape. While some remnant of a scar will usually be visible, it should look more like a natural imprint - a relic of the hide from before it was hide - part of the organic design that makes it unique. The results to healing deeply scratched, scarred, and worn out leather speak for themselves.
Alas, with deep cuts, cracks, and similar blemishes, many conditioners simply won't cut it, as they absorb too well into the leather, leaving too little behind at the surface to disguise blemish effectively. In this case, it is best to use something with a waxy, pasty consistency, designed for spot and detail work. Very happily, Leather Milk's got you covered. Check out Healing Balm, designed to do just that.
Healing Balm is formulated to effect leather's surface primarily, keeping healthy waxes and oils concentrated near the surface at a very slow absorption rate. This being the case, if you have not conditioned your leather recently, it's a good idea to supplement Healing Balm with a traditional conditioner, like Leather Care Liniment or Auto Refreshener, and if you have not cleaned the leather recently, it is also best to give it a deep cleaner before you condition, such as Straight Cleaner (using a conditioner to clean will just seal latent impurities inside your leather, rather than remove them!).
Step by Step
How does this work? Let's check out the process:
- Clean your leather. Test your cleaner first. Apply gently, and cleanse as much as you keep pulling out grime and dust (but don't let your leather become too dry). If your leather starts feeling super dry - and if you are treating cracked leather, chances are it's already going to feel pretty dry by the time you start - it's a good time to add conditioner. When treating leather that's been neglected for a while, it's good to at least give it one treatment of cleaner before you begin, just to remove the layers of dust that have had time to settle inside the leather's pores.
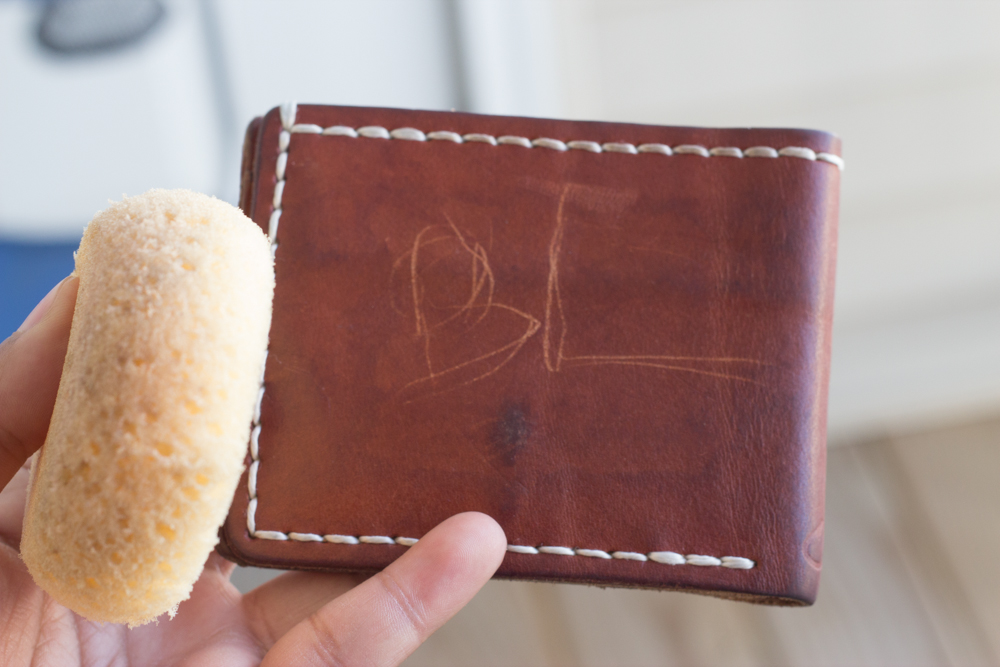
- Apply Healing Balm over the scratch/cut/crack using your finger or the application sponge that came with it. You are doing detail work here, rather than giving the leather a complete layer of conditioner. The leather may absorb Healing Balm reasonably quickly, owing to its thirstiness, so just apply a small amount right now, and make sure you test it first before you apply. After you have applied Healing Balm to the distressed area, smooth the leather's color out with an even, complete spread of standard conditioner. Let the leather dry naturally.
- You can go over the affected area again with Healing Balm if the blemish is still there. Apply gently, as Healing Balm is a very strong conditioner, and it won't likely take very much at all to fully condition your leather. Afterwards, apply another even spread of conditioner. You can keep this going until you are satisfied with the results, or until the leather no longer absorbs conditioner - at which point you should buff the leather off and let it dry naturally.
Hope this helps! Cracked leather's not great to have, but even then, you've got options. Just be persistent, be patient, and be gentle, and you can get that leather back to snuff in no time. Cheers, aficionados!