

How to Remove Your Leather Salt Stain
Posted by Daniel Sutton on Jul 29th 2014
Anyone who’s accustomed to the sight of snow is accustomed to the sight of salt. This white gold has been an extraordinarily valuable commodity all throughout history. It was the refrigerator before refrigerators were cool, a stand-in for money, and a magic spice to give pork chops that savory edge. Today, it also helps us keep our roads free of hazardous freeze-overs and their subsequent pileups.
But salt’s got its kryptonite: leather. Salt does not help out at all when you’re wearing hide, and has a knack for leaving the most permanent and painfully visible leather salt stain you’ll ever have the misfortune of wearing. Before you know it, little white rims are wrapped around your soles and spiraling upwards, bunkered in so tightly you think your shoes are possessed. But the demon doesn’t come from without, grasshopper. This demon comes from within.
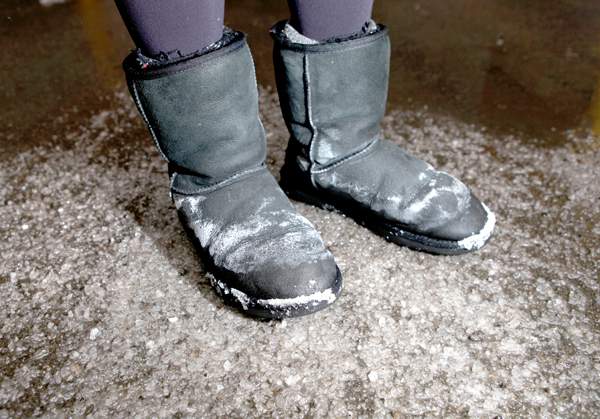
Salt Stains on Leather Boots
Well, partly.
Too Much Sodium
During the leather tanning process (which you can read a little about in our blog “Leather Tanning Methods”), salt is among many of the preservatives used to get your leather in shape. It’s got a place, deep, deep inside your leather. Unfortunately, lots of wetness can bring it right back up to the surface, and it throws a tantrum in the form of those white spots.
So how do we get rid of them?
Two words, leathermancers: Distilled. Vinegar. Make sure the vinegar you use is mild, lest its pH level harm your leather. You’ll want to mix it in a vat of cold water first, and apply your potion to the leather’s surface with a clean, lint-free cloth. Rub gently, and don’t get the leather too wet. Only rub the leather enough for the stain to disappear. You may need to do this in multiple sessions.
Wound in the Salt
For added punch, Chamberlain has a deep cleaning recipe called Straight Cleaner no. 2. This will seep deep into the pores of your leather, giving you an extra edge in your fight with the leather salt stain. Apply after your leather dries, and you’ll want to test it in a discreet area first (don’t use on suede). If your leather likes it, wipe it into the surface thinly and evenly, and then clean off any residue. Then allow the leather to dry in a cool, clean area away from sunlight and heat. Remember that using heat as a drying treatment is a bad idea, so don’t go putting it in the sunlight or under a blow dryer. That’s hurts your leather's integrity (and may even shrink it). When it comes to the leather salt stain, the ends do not justify the means.
After you use a leather cleaner, it’s always best to follow up with a leather conditioner, such as Chamberlain's Leather Care Liniment no. 1. Test first, and then massage it evenly over your leather and leave it to dry for a bit. Afterwards, buff off any extra juice, and let it sit overnight to finish letting all that good stuff set in. It’ll be set to go in the morning (hopefully free from the jowls of that pesky leather salt stain!), and back into your radiant hands.
Hopefully that’ll help get you through the next chilly season safe and snug. Winter is coming, but that’s no reason to get gloomy. For a little extra prudence, you could always plan ahead and give your leather some extra protection with Chamberlain’s Water Protectant no. 3 – specially designed to ward off all that rain, mud and snow that keeps pestering at your door. You’ll never have to lose your temper again. Bye-bye leather salt stain!
Contributors
Daniel Sutton
goodhousekeeping.com
blog.freepeople.com
Got more leather questions? Suggest a blog topic to us here!